When RC Helicopters Collide
Friday, September 10th, 2010
I trained my friend with a buddy box (LP5DSM) and my DX7 on the E-Flite Blade mSR. Not a single crash and he was ready by himself. He took it by himself and flew it nose out, take off, and land, without crashing. Not bad from only flying coaxial micro RC helicopters. I had my Blade CX2 so I started flying at the same time. We were pretty good hovering them beside each other. Many flights later it happened, they collided. Surprisingly, the Blade mSR won the battle. The Blade CX2 top blade smashed, i think the canopy, of the Blade mSR causing the blade to snap at the end. The Blade mSR, not a scratch. Cool.
I’ve flown the Blade mSR everywhere for the past couple of months and I’ve yet to replace a part. It’s had several careful crashes and falls. The blades are scratched but not cut. I’ve had to clean the motors a few times but other than that it’s been perfect. I would still suggest the Blade CX2 if you want to start flying RC helicopters because it has more power for controlled flight and crashing once will most likely brake it so you’ll try harder to fly with control.
Tags: Blade CX2, blade msr, crash, rc helicopter
Posted in Blade CX2, Blade mSR, Crash Report | No Comments »
RC Helicotpers – 1 Month Summary
Tuesday, August 3rd, 2010
I’ve been flying a few days a week for just over a month now. I’ve been using E-Flite models starting with the Blade CX2 then moving to the Blade SR and the Blade mSR. I started practicing with training wheels and the phoenix flight simulator. I was quick to pick it up and I’m able to push the CX2 to its limits without problems. You can only go so fast with the coaxial models so I upgraded to the Blade SR and picked up an mSR on the side.
The E-Flite Blade CX2 got me started. I bought the RTF kit, extra battery and training gear. I was off the ground first go but only for a few seconds hover. I spent 1 week hovering and moving forward/backward left/right nose out. If you’re lucky to get a windless day take it outside and give yourself some playing room. The Blade CX2 is simple to correct if you lose control. Watch the wind. Even if the trees aren’t blowing there could be small small gusts that will affect the flight. Adding extra weight to the nose and moving the battery forward will help outdoor flights. I’ve crashed the CX2 a few times. I’ve replaced blades, skids, and one crash took out my canopy so I had an excuse to get another one. The main shaft is very slightly bent and noticeable at full throttle but it hasn’t affected the helicopter enough to need replacing. That will be the next repair.
The E-Flite Blade SR got me started on single rotor RC helicopters. I also got the training gear. The Phoenix RC Flight Simulator has the full line of E-Flite models so I flew the Blade SR for a few hours on the Sim before taking it out. My maiden flight was a success and I’ve been practicing basic forward/backward left/right movements nose out. I felt I was comfortable so I tried a simple circle. I ended up correcting a problem the wrong way and smashed it into the ground. I broke the blades, training gear, main gear, tail rod, and blew the tail motor. Fun, and I’ll have more fun undoing the solder to rewire the tail motor…
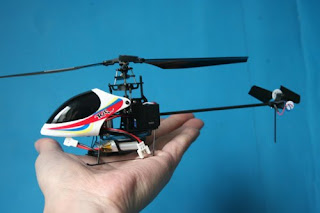
The E-Flite Blade mSR is the micro version of the Blade SR and my latest addition. It’s basically a very small single rotor helicopter and it’s fully loaded. I got the Bind and Fly kit meaning I can use my existing transmitter to control the Blade mSR. The maiden flight was the best one I’ve had yet. Out of the box, the Blade mSR was performing very well with my limited flying experience. I could fly it comfortably (nose out) in all directions. I brought the helicopter outside and played around with orientation. After just 2 days I’m very comfortable hovering and spot landing it. I own a handful of micro helicopters but the Blade mSR destroys them. If you like booting around every now and then indoors then this is the model for you. Spend the extra money and get into a real micro RC Helicopter.
Tags: Blade CX2, blade msr, Blade SR, micro rc helicopters, phoenix, rc flight simulator, rc helicopter
Posted in Blade CX2, Blade SR, Blade mSR, News, RC Flight Simulator, Training | No Comments »
Progress Report – Week 3
Tuesday, June 22nd, 2010
I’ve had a good 2 weeks with the Blade CX2. I’ve had several flights outside and inside with two crashes to date. One crash was small but the blades knocked and broke them all. The other crash was fast, watch the video, and bent the main shaft slightly but not enough to throw it off.
My swashplate wasn’t level, so I’ve made adjustments to the server arms and pushrods and trimmed the weird rudder movement with the pot on the controller. With all trims centered the helicopter hovers to the best of my abilities. Trimming took a while. You have to make the minor adjustments by disassembling then reassembling for testing. Put a few hours aside if it’s way off, or if you’ve overcorrected by accident. I messed up so be careful. Make very small adjustments, half turns for the server pushrods and very very small turns on the controller pots.
Outside is fun if it’s not windy. There are a few problems with the wind that really take down the Blade CX2. First is the design. It’s not meant for outdoor flight because the model doesn’t have a rudder and the coaxial blades just can’t cut the wind. But it’s definitely not impossible. Try flying with the wind and maybe trim some forward cyclic. The rudder will swing if the wind hits it so have good orientation, my 3 weeks is ok in calm calm wind. I’ve gotten in going pretty fast with a little wind, but I’ve had to slow it down fast by swinging the rudder in the opposite direction giving throttle and correcting. Be prepared for the worst because you’re already taking risks being outside if this is your first helicopter.
Until next time…
Tags: beginner, Blade CX2, rc helicopter
Posted in News | No Comments »
How To Level The Swashplate
Tuesday, June 15th, 2010
So I got my E-Flight Blade CX2 Ready To Fly (RTF out of the box), and it wasn’t so RTF. I made a big mistake and not figure out the workings of the helicopter before flying it. I noticed I had to use a lot of right rudder trim to compensate the left rudder movement. It definitely wasn’t normal, so I took the helicopter apart and noticed everything was off!
I had one crash before the adjustment, but I’m convinced it was shipped this way from day 1. The swashplate isn’t level, and the servo pushrod isn’t 90 degrees to the server arm. There was quite a difference when I moved the server pushrod on the second notch, but not perfect enough to level the swashplate.
I had a big problem. After I made the adjustments I thought everything was level, it was not, in fact it wasn’t even capable of taking off at this point. I always underestimate this helicopter thinking you can just whiz by a couple forum posts and fix everything. These are delicate machines, even the blade cx2, and you have to understand exactly what does what so you fix it. So far everything I’ve tried has failed multiple times and that just sucks. I’m not giving up. So when I got home today I went back to the books and read everything over and over again. In the end, with only about 2 hours of research and work on swashplate leveling, I was hovering better then ever, and much better then out of the box. The best I can do is trim 2 clicks left rudder for perfect hover .
How I fixed a serious left nose rudder drift, elevator and aileron drift.
I made a great mistake and seriously destroyed the balance of my helicopter by doing everything wrong to fix a minor drift. I’m sorry I won’t get into too much technical detail so watch the video for more info.
Adjusting Rudder Drift
The Main Motor Proportional Mix Trimmer Pot can be found on the left side of the control unit. This “proportional” trimmer pot adjusts the amount of mixing between the main motors allowing you to fine-tune the rudder trim (sub-trim) to help prevent the nose from drifting to the left or right when in hover.
Note the direction the nose of the helicopter is trying to drift with the rudder trim centered and no rudder input.
Power off and remove the shell of the helicopter.
Turn the Main Motor Proportional Mix in the rotation required to correct the drift. If the nose is drifting to the left, you will want to increase power to the right-hand motor (spinning the upper main rotor blade), by turning the Proportional trimmer pot clockwise (+).
Hover the helicopter and make finer adjustments as needed.
Adjusting Elevator (forward/backward) Drift – The Swashplate
If your helicopter is drifting forward or backward you can first take a look at the elevator server arm and pushrod and make sure the swashplate is level. If your helicopter is also drifting left and right, adjust the aileron server after the elevator. Why? Because this process works great for me and I’m sticking to it.
Remove the shell. Center the trims and power on the transmitter, then plug in the battery to the helicopter. You want to make these adjustments while it is turned on so the servos stay centered. Unplug the motor power for safety.
Align the server arm with server pushrod. The elevator servo is on the right of the helicopter looking from the back. First you will want to check if the servo pushrod and arm are 90 to each other. If they aren’t then you will need to move the pushrod into another hole in the arm. First, remove the screw holding the arm in, pull off the arm and disconnect the pushrod. Put it back in the opposite order.
Align the swashplate. You can eyeball this but it’s best to hover the helicopter and make small adjustments. If you were to eyeball it, good luck, just make sure the swashplate is level in relation to the rotational plane of the main rotor blades.
Hover the helicopter and make finer adjustments as needed.
Adjusting Elevator (forward/backward) Drift – The Swashplate
If your helicopter is drifting left or right, use the same method here just on the opposite server. From looking at the back of the helicopter the aileron server is on the right.
Remove the shell. Center the trims and power on the transmitter, then plug in the battery to the helicopter. You want to make these adjustments while it is turned on so the servos stay centered. Unplug the motor power for safety.
Align server arm with server pushrod. The aileron servo is on the right of the helicopter looking from the back. First you will want to check if the servo pushrod and arm are 90 to each other. If they aren’t then you will need to move the pushrod into another hole in the arm. First, remove the screw holding the arm in, pull off the arm and disconnect the pushrod. Put it back in the opposite order.
Align the swashplate by removing the server pushrod and extending or screwing in the metal connector. Your smallest adjustment can be 1/2 turn. Again, I wouldn’t recommend the eyeball method to align it.
Hover the helicopter and make finer adjustments as needed.
Let me know if you’ve got any questions and I’ll try to answer them.
Good luck!
Tags: Blade CX2, Maintenance, rc helicopter, swashplate
Posted in Blade CX2, Maintenance | No Comments »
Blade CX2 Crash – Full Speed Fail
Sunday, June 13th, 2010
I spoke too soon! Here’s a great example of how durable the E-Flight Blade CX2 is. Mind the sensitive mic at points.
I had been flying all day without any problems, basically taking way to many risks with the Blade CX2 RC helicopter around a baseball park. I’ve got a Logitech 9000 stapped to my hat with a USB extension cord. Make sure you’re watching this in HD! This was clearly a pilot error, but I would hardly call myself a pilot . My mistake was freaking out and dropping the throttle slightly and I lost lift.
End result, full speed nose dive into the grass with a few summersaults.
Tags: Blade CX2, crash, e-flight, full speed, outside
Posted in Blade CX2, Crash Report | No Comments »
How To Balance RC Helicopter Blades
Sunday, June 13th, 2010
Has your RC helicopter tipped over or been in a crash? You should check the balance of the blades. If your helicopters blades when connected together have a mountable point in the center, attach fishing line and hold the blades in the air. You can follow the instructions on RC Airplane World.
If you have an e-flight model, beginner coaxial, you can use 2 decks of cards and some tape to balance the blades.
E-Flight Coaxial Blade CX2 Blade Balancing
Place two deck boxes of cards beside each other so the short rectangular sides will provide the surface for the blade ball connector.
Remove the upper and lower blade set from the helicopter
Carefully connect them back together and rest the ball connectors on the card boxes.
Watch the tilt and if it’s off center apply small amounts of tape to the underside of the blade to correct the balance.
Tags: balance blades, Blade CX2, how to, Maintenance
Posted in Maintenance | No Comments »
How To Install Training Gear
Friday, June 11th, 2010
If you’ve got your first RC helicopter model, I suggest that you install training gear before your first flight. The training gear helps to further increase the stability of the model while also providing added support and cushioning to prevent tip-overs and damage to the model from abrupt landings.
Installing the training gear takes only a few minutes following these steps. The training gear kit includes four training rods with plastic balls installed, four training gear rod to landing skid attachments, four screws and one training gear rod base.
1) Locate the four training gear rod to landing skid attachments and four screws. Note that there are two types of attachments, two are for the left skid and the other two for the right. Carefully snap two of the attachments onto the landing skids forward of the landing skid struts. The side of the attachment with the large hole should face outward, away from the helicopter, and forward to the front of the helicopter.
2) Next, carefully snap the remaining two attachments onto the landing skids behind the landing skid struts. The side of the attachment with the large hole should face outward, away from the helicopter, and backward to the rear of the helicopter.
3) Once you have installed all four attachments, install the four screws making sure that they thread properly into the back side of the attachment. It may be helpful to squeeze the attachment with a pair of pliers to make it easier to threat the screw into the backside of the attachment. Do not tighten the screws all the way at this time, as the attachments will need to be adjusted for proper alignment once the training gear rods are installed.
4) Locate the four training gear rods and rod mounting base. Note that the rod mounting base has four channels into which the training gear rods will mount. The open side of these channels will face upward toward the bottom of the helicopter when properly installed.
5) Carefully pass each of the rods through the attachments on the landing skids and into the channels on the base. Take care to not pull the landing skids out of their mounts in the battery supports.
6) After ensuring that the rods are secure in the base, adjust the positions of the attachments on the landing skids so that the base is centered under the main shaft of the helicopter. Once confirming the base is centered under the main shaft, make sure that each of the landing skids is still firmly installed in the mounts of the battery support. Note that the landing skids may be pulled slightly inward under pressure of the training gear rods.
7) With the attachements, rods and base properly positioned, you can now tighten the attachment screws until they are just snug. Take care when tightening the screws to prevent stripping the backside of the attachments.
Adjust the position of the tubing keepers and plastic balls on the training gear rods so that the balls are positioned approximately 1/8″ from the end of each rod. Be sure that the tubing keepers are positioned so that the plastic ball can still spin freely on the rod.
Your helicopter is now ready for flight with the training gear installed!
Tags: Blade CX2, how to, install, rc helicopter, training gear, video
Posted in Training | No Comments »
First Crash!
Wednesday, June 9th, 2010
I’ve had the training wheels off for a few days now and it’s not hard controlling the CX2. I’ve had roughly 20 short flights and 8 hours in the simulator.
The crash was simple. I was risking the wind and lost control in a gust. I almost had it but the blades gently brushed a concrete wall causing the top and bottom blades to slam into each other breaking 1 completely and minor damage on the other. No scratches to anything else. I replaced the blades in 5 minutes and was back in the air for $5. Interesting enough, the replacement blades have fixed quite a bit of left rudder movement and I can trim less.
I’ve got another battery, 3 total now. The wind is a huge factor so no more taking chances when I think it’s ok.
After 1 week of flying and simulator practice I’m very confident flying. I’m still waiting for a windless day!
Tags: Blade CX2, crash, wind
Posted in Crash Report, News | No Comments »
E-Flite Blade CX2
Wednesday, June 2nd, 2010
I walked into my local hobby store and walked out with a Blade CX2. The salesmen sold me a beginner model that works out of the box, for the most part. It came complete with transmitter, Li Po battery and charger, small parts for maintenance with tool, 4 AA’s for the transmitter, and manual with DVD. You can also charge using a 12v car battery with the aligator clips included. I bought replacement blades and skid plate for the inevitable, a training kit, and an extra battery.
I was ready to go. Since I’m a beginner I figured the trainer gear was necessary, good call. Here’s a video on how to install the training gear. manual had a great section on how to get them on. I charged the battery as instructed and put it in the helicopter. The front body was finicky to remove but it needed to make sure the servos were working. Everything was fine so I put it on the ground and gave it throttle. I made my first mistake by not turning the throttle trim down before turning the transmitter on. Good thing the controller knows the transmitter isn’t producing any throttle and shuts down the motors if they are. I hit myself and went back to the manual. I’m a video gamer, sure, I skipped sections and I’m not proud of it, okay?
Update:
I wouldn’t call myself a beginner flyer anymore and the Blade CX2 has proved worthy. If I need more power and the micro isn’t cutting it, I’ll bring out the CX2.
The Details
The E-Flite Blade CX2 is a coaxial LiPo battery electric powered RC Helicopter. It’s not a micro RC helicopter so you’ll get a little more size and power, quite a bit compared to a micro. This CX2 was designed to introduce new flyers into the hobby. It’s easy to fly but you won’t get away with crashing it if you own a Blade mSR. It will break and expect repairs when the inevitable happens.
Out of the box:
- 5-channel transmitter with built-in Spektrum™ 2.4GHz DSM technology
- 2-cell 7.4V 800mAh LiPo battery pack
- 2–3 Cell DC LiPo Balancing Charger and AC Adapter
- Blade Cx2 Helicopter model
- Manual with a Instructional Video
- 4 AA Batteries for transmitter
- Bind Plug, Micro screwdriver, Velcro material and Double sided tape
Specifications:
- Main Rotor Diameter: 13.6 in (345mm)
- Gross Weight: 8.0 oz (227 g with battery)
- Length: 16.42 (417mm)
- Motor Size: 180 (2 installed)
- Control System: 2.4GHz DSM 5-channel, 4-in-1 receiver/mixer/ESC/gyro, S60 Super Sub-Micro
This was my first RC helicopter and I’ve had several flights on it since. It only took less then one week to get comfortable flying it. It’s a great coaxial helicopter but it will struggle in slight wind. It’s meant for indoors but you can get away with it outside as long as it’s completely calm. This model also makes a perfect gift because everything is packed in the box, ready to fly.


Saturday, October 16, 2010

Posts Tagged ‘micro rc helicopters’
Micro RC helicopters can’t get much smaller than the Li’l Flyer. For a very good price you can own one and start flying RC helicopters. There’s been some negative feedback on this model but I’ve found it to be almost perfect.

I was first impressed with the repair kit it came with. A little box labeled “repair kit” full of many parts that will likely break. It comes with 8 replacement blades! It’s 2 sets of 4 but you usually just break a couple blades at a time, if any if you’re careful. It also comes with, flybar, screwdriver and hardware.
Charging took about 30 minutes with new batteries. Charging time will be longer as the batteries are used. There’s no forward movement. Some micro RC helicopters will have a tail rotor which can control forward and backwards flight. The Li’l flyer has no just the 2 coaxial blades and the design automatically moves the helicopter forward. If you’re just beginning to fly this is perfect because you’ll learn how to use the rudder. If you have experience flying I would suggest a piece of balled up tape on the front nose to make it faster. It works really well.
The rudder is very sensitive because of the size but the remote is fully capable of controlling fine movements. It also has left/right trim. Take-off is completely wacky but to me it’s a funny feature. The helicopter forces itself to spin when you take off. It’s possible to control but not worth the effort. Once you’re in the air the helicopter will start to move forward. The throttle control stick spring is a little strong but not something to worry about. Flying time is approximately 10 minutes.
Overall, the Li’l Flyer is FUN! I was surprised to see how stable it is in the air, no vibrations at all. Take-off is sketchy but always possible. Flying and landing is very controlled and the LED lights are great for the dark. When I added some weight to the nose it was like putting a new motor on. Definitely try that. I’ve crashed it lightly a few times but there’s not a single scratch! If you’re a beginner flyer, expect to brake some blades and if you’re a hobbyist this one’s fun to mess around with indoors and affordable to promptly add to the collection!
Out of the box:
- Li’l Flyer Ultra Compact RC Helicopter (with LED lights)
- Lipo Battery (charged by transmitter cable directly in helicopter)
- Infra-red Transmitter, single channel (sold A/B/C for up to 3 models in the air at the same time), 80 foot range.
- Repair Kit
No batteries included. Requires 6 AA’s.
Micro RC Helicopters
Friday, September 10th, 2010Some call them micro, some call them miniature, and some just call them small RC helicopters. They all stand in at just under a few grams. The light weight design gives the model flying capabilities with minimum power.
There are several micro RC helicopter models available and I wouldn’t consider them toys. They’re all capable of flying and some have better technologies to improve stability.

There are several items that make up a micro RC helicopter. The picture above represents a cross-section of one. It’s a simple concept that works with a balanced aircraft.
Power
It’s powered by a dense lipo battery that moves the miniature dc-motor. Attached to the motor is the main gear that drives the main rotor. It also powers the Tail motor which moves the tail rotor.
Movement and Control
The infra-red sensor receives the movements from the transmitter which the controller board interprets to use variable power on the tail rotor. There are no servos on most micro RC helicopters. The fly-bar on top helps stabilize the helicopter and it’s all encased in a light Styrofoam body.
Most micro RC helicopters are made for the hobbyist. It’s a perfect introduction model if you’re interested in starting RC helicopter flying. These are also great for the experienced flyer because it’s safe to fly around indoors. The best part about micro RC helicopters is the price it costs to get the feeling of RC flying.
RC Helicotpers – 1 Month Summary
Tuesday, August 3rd, 2010I’ve been flying a few days a week for just over a month now. I’ve been using E-Flite models starting with the Blade CX2 then moving to the Blade SR and the Blade mSR. I started practicing with training wheels and the phoenix flight simulator. I was quick to pick it up and I’m able to push the CX2 to its limits without problems. You can only go so fast with the coaxial models so I upgraded to the Blade SR and picked up an mSR on the side.
The E-Flite Blade CX2 got me started. I bought the RTF kit, extra battery and training gear. I was off the ground first go but only for a few seconds hover. I spent 1 week hovering and moving forward/backward left/right nose out. If you’re lucky to get a windless day take it outside and give yourself some playing room. The Blade CX2 is simple to correct if you lose control. Watch the wind. Even if the trees aren’t blowing there could be small small gusts that will affect the flight. Adding extra weight to the nose and moving the battery forward will help outdoor flights. I’ve crashed the CX2 a few times. I’ve replaced blades, skids, and one crash took out my canopy so I had an excuse to get another one. The main shaft is very slightly bent and noticeable at full throttle but it hasn’t affected the helicopter enough to need replacing. That will be the next repair.
The E-Flite Blade SR got me started on single rotor RC helicopters. I also got the training gear. The Phoenix RC Flight Simulator has the full line of E-Flite models so I flew the Blade SR for a few hours on the Sim before taking it out. My maiden flight was a success and I’ve been practicing basic forward/backward left/right movements nose out. I felt I was comfortable so I tried a simple circle. I ended up correcting a problem the wrong way and smashed it into the ground. I broke the blades, training gear, main gear, tail rod, and blew the tail motor. Fun, and I’ll have more fun undoing the solder to rewire the tail motor…
The E-Flite Blade mSR is the micro version of the Blade SR and my latest addition. It’s basically a very small single rotor helicopter and it’s fully loaded. I got the Bind and Fly kit meaning I can use my existing transmitter to control the Blade mSR. The maiden flight was the best one I’ve had yet. Out of the box, the Blade mSR was performing very well with my limited flying experience. I could fly it comfortably (nose out) in all directions. I brought the helicopter outside and played around with orientation. After just 2 days I’m very comfortable hovering and spot landing it. I own a handful of micro helicopters but the Blade mSR destroys them. If you like booting around every now and then indoors then this is the model for you. Spend the extra money and get into a real micro RC Helicopter.
E-Flite Blade mSR
Tuesday, August 3rd, 2010I was thinking of getting another micro model just so I had another indoor model to go in the rotation. The problem with the toy store helicopters is not so much the flying, it’s the AA batteries. The Blade mSR uses E-Flite’s LiPo battery system and it comes shipped with two batteries and a multi charger that can charge 4 at a time. Each flight lasts 5-10 minutes and the charge time is <45>
Out of the box, I binded my HP6DSM SR transmitter with DIP switch 4 up. This configuration works but since the transmitter was built for the SR you won't get full capabilities. Read this Blade mSR and HP6DSM I found. I haven’t tried my Blade CX2 transmitter but I’m told it will work fine. The maiden flight was a success. I’ve read so many stories of people not having their DIP switches in the right positions and the helicopter with move in opposite directions from your input. This is why checking servos and transmitter response is important before every flight. I had the wrong DIP switches set but noticed right away in my pre flight test.
The Details
The Blade mSR comes Ready To Fly or Bind and Fly. The only difference is the transmitter that comes with the Ready To Fly model. It’s slightly more expensive. This review is on the Blade mSR Bind and Fly model.

Out of the box:
- Blade mSR RC Helicotper
- Blade mSR Tranismitter. (only with RTF kit)
- 2, 1 cell LiPo Batteries 3.7v, 120mAh.
- Battery Charger. (can charge up to 4 batteries!)
- Manual
Specifications:
- Main rotor diameter: 180 mm (7 in)
- Total length: 190 mm (7.5 in)
- Flying weight: 28 g (1 oz) including 120 mAh battery
- Battery: 1 cell Li-Po (lithium polymer hybrid), 3.7 V
- Radio standard: 2.4 GHz DSM2 compatible with all DSM radios
- Radio channels: 4 channels: throttle, yaw, fore/aft and left/right cyclic
- Color: Blue, red canopy also available separately
The E-Flite Blade mSR is perfect for anyone getting into RC helicopter flying or if you just want something simple to boot around with indoors. The single rotor has much more control compared to any micro coaxial I’ve flown so ditch out the extra money if you want something a little better then your toy store helicopter. Crashing is still out of the question. Yes, the micro model will have less impact because of the weight, but if your blades are spinning on impact expect the worst and be prepared to replace parts.
How to bind a DX7 transmitter to the Blade mSR
By RCGeeks.ca
Galaxy Hobby Review
Wednesday, July 7th, 2010Living in Toronto, there are a few hobby stores I have to pick from. I’ve had some bad experiences with hobby stores in the past but not anymore. Derry from Galaxy Hobby was all to pleased to get me setup and in the air.
First, I checked out their website www.galaxyhobby.ca and was lucky to find they had the whole line of E-Flight Blade RC Helicopters. I drove over to Central Parkway/Mavis in Mississauga and met Derry and his quaint hobby store. Galaxy Hobby focuses on RC cars so I was skeptic about their helicopter knowledge. I shouldn’t have been. Derry knew everything about the products and was very knowledgeable in RC helicotpers. We took a look at the Blade SR. He cut the packaging tape and brought the helicopter out I would later by. He gave me a full tour on single blade helicopters and explained with a big smile the “challenge” it would be to fly it. Derry gave me some tips on flying and mods I could do to the helicopter. The best part about being there was the non egotistical attitude I’ve seen almost everywhere else.
If you’re a beginner like myself and want to get started in electric RC helicopters, or even if you’re ready for a 3D electric RC helicopter, go to Galaxy Hobby and talk to Derry. I also noticed a many of the micro RC helicopter scale models in the store. If you’re thinking of getting an airhogs RC helicopter, you should instead go to Galaxy Hobby, or your local store, and check out their collection first. They’re much better then the toy store brands and they’re even cheaper to buy. People just don’t know this stuff! (it fooled me)
Posts Tagged ‘rc helicopter’
Posts Tagged ‘rc helicopter’
Li’l Flyer Micro RC Helicopter Review
Saturday, September 11th, 2010Micro RC helicopters can’t get much smaller than the Li’l Flyer. For a very good price you can own one and start flying RC helicopters. There’s been some negative feedback on this model but I’ve found it to be almost perfect.
I was first impressed with the repair kit it came with. A little box labeled “repair kit” full of many parts that will likely break. It comes with 8 replacement blades! It’s 2 sets of 4 but you usually just break a couple blades at a time, if any if you’re careful. It also comes with, flybar, screwdriver and hardware.
Charging took about 30 minutes with new batteries. Charging time will be longer as the batteries are used. There’s no forward movement. Some micro RC helicopters will have a tail rotor which can control forward and backwards flight. The Li’l flyer has no just the 2 coaxial blades and the design automatically moves the helicopter forward. If you’re just beginning to fly this is perfect because you’ll learn how to use the rudder. If you have experience flying I would suggest a piece of balled up tape on the front nose to make it faster. It works really well.
The rudder is very sensitive because of the size but the remote is fully capable of controlling fine movements. It also has left/right trim. Take-off is completely wacky but to me it’s a funny feature. The helicopter forces itself to spin when you take off. It’s possible to control but not worth the effort. Once you’re in the air the helicopter will start to move forward. The throttle control stick spring is a little strong but not something to worry about. Flying time is approximately 10 minutes.
Overall, the Li’l Flyer is FUN! I was surprised to see how stable it is in the air, no vibrations at all. Take-off is sketchy but always possible. Flying and landing is very controlled and the LED lights are great for the dark. When I added some weight to the nose it was like putting a new motor on. Definitely try that. I’ve crashed it lightly a few times but there’s not a single scratch! If you’re a beginner flyer, expect to brake some blades and if you’re a hobbyist this one’s fun to mess around with indoors and affordable to promptly add to the collection!
Out of the box:
- Li’l Flyer Ultra Compact RC Helicopter (with LED lights)
- Lipo Battery (charged by transmitter cable directly in helicopter)
- Infra-red Transmitter, single channel (sold A/B/C for up to 3 models in the air at the same time), 80 foot range.
- Repair Kit
No batteries included. Requires 6 AA’s.
When RC Helicopters Collide
Friday, September 10th, 2010I trained my friend with a buddy box (LP5DSM) and my DX7 on the E-Flite Blade mSR. Not a single crash and he was ready by himself. He took it by himself and flew it nose out, take off, and land, without crashing. Not bad from only flying coaxial micro RC helicopters. I had my Blade CX2 so I started flying at the same time. We were pretty good hovering them beside each other. Many flights later it happened, they collided. Surprisingly, the Blade mSR won the battle. The Blade CX2 top blade smashed, i think the canopy, of the Blade mSR causing the blade to snap at the end. The Blade mSR, not a scratch. Cool.
I’ve flown the Blade mSR everywhere for the past couple of months and I’ve yet to replace a part. It’s had several careful crashes and falls. The blades are scratched but not cut. I’ve had to clean the motors a few times but other than that it’s been perfect. I would still suggest the Blade CX2 if you want to start flying RC helicopters because it has more power for controlled flight and crashing once will most likely brake it so you’ll try harder to fly with control.
How to setup a Buddy Box
Wednesday, September 1st, 2010In this video I’ll show you how to connect a second transmitter to use as a “buddy box” when learning how to fly RC Helicopters or RC anything.
You will need a programmable transmitter and another one with a trainer input. The trainer cord can simply be a male to male stereo audio cable like one you would use with a computer. I found mine in a box of audio cables.
Bind your RC Helicopter to your master transmitter.
Depending on your transmitter you’ll need to set specific settings under the Trainer options. For the DX7 connecting to the LP5DSM (blade cx2 trasmitter) you’ll need to set P-Link mode. For connecting a DX7 to a DX6 you’ll need to select NORMAL mode. You also have an option to select which switch is used to give control to buddy box. With the DX7 you can select the left or right rocker switches.
You don’t need to turn on your slave controller. The feed from the cable doesn’t require power. You can also unplug the transmitter from your slave remote as it’s not required.
Plug in the cable to your master transmitter then plug it into the slave.
Test the controls and have fun. Now you can learn how to fly or let a friend try without the fear of someone else crashing.
E-Flite Blade 120 SR Review
Monday, August 16th, 2010   |
The Blade 120 SR is a new model by E-Flite and it follows the smaller Blade mSR. I’ve been flying the Blade mSR and I’m very happy with it. Now, the Blade 120 SR is in the collection and it’s another solid model to fly. The Blade 120 SR is a slightly larger model and it’s a great upgrade. This is good model if you want to get out of coaxial helicopters and into single rotor collective pitch. This isn’t a helicopter you can pick up and not expect to brake in the first flight. If you crash lightly it will most likely be fine, but a good smack into a tree will probably be a trip to the hobby store. If you don’t have it already, get the Phoenix RC Flight simulator to practice.

The Details
What’s different? I kind of see it as a Nintendo Gameboy, offering slight modifications to their lineup every so often. The biggest difference with the Blade 120 SR is the size. It uses the same 5-1 control board as seen on the Blade mCX. With that said, the technology is the same. It’s the Blade mSR’s other brother.
Out of the box:
- RTF and BNF available
- Blade 120 SR RC Helicopter
- 4 channel 2.4 GHz DSM2 radio
- Charger for LiPo Battery
- Single cell 500 mAh LiPo Battery
- Tools, basic spare parts
- Instruction Manual
Specifications:
- Length: 318mm (12.5 inches)
- Main Rotor Diameter: 318mm (12.5 inches)
- Weight with Battery: 106g (3.75 oz)
- Main Rotor Motor: Brushed
- Tail Motor: Brushed
- Battery: 500mAh – 12C – 1cell – 3.7V LiPo
- Charger: Celectra 1 cell variable charge rate with 6V 1.5A AC adapter
- Transmitter (RTF): 4 Channel, DSM2 2.4 GHz model #MLP4DSM
- Electronics: 5-in-1 unit
   |
   |
   |
   |
  |
Pow
helicopter amazing
ooking for Rc helicopter Price List?
Good deals mean good price(find best rc helicopter price list). I collect some mini rc helicopter price list around. Actually i found many mini rc helicopter price list over the internet. If you want to buy mini rc helicopter, this article can be your first consideration before you buy the mini rc helicopter, such as the price estimates. I wrote some of the mini rc helicopter price list in this article, so keep read on. DragonFly King RTF 3CH Mini RC Helicopter : This rc helicopter has altitude, rotor speed control and a flight stabilizing system. In addition to that when you combine 2 motors with a super lightweight design and 3 channels of movement, you are sure to have a great flying experience. The Mini DragonFly King comes fully loaded and Ready-to-Fly (RTF). It includes a rechargeable battery pack, & AC adapter charger. Estimate price : $34.99
 Mini RC Helicopter Dragonfly Prince : This mini rc helicopter has some feature such as Remote control features a throttle stick, directional stick, and trim control, Mini helicopter operates off of a 3-channel IR system, so 3 different helicopters can be flown in the same area, Auto balancing system makes helicopter easy to operate, Includes helicopter, controller, charger, spare tail propeller, and 9V battery and Super wide IR control system controls helicopter from all angles while reducing battery consumption. Estimates price : $9.90
 Walkera Mini RC Helicopter : This mini rc helicopter has only 185mm in overall length with 3g in servo weight with 4-ch telecontroller and marked electricity indication function, you can avoid the crash caused by lack of telecontroller electricity and let you fly at ease.The walkera mini rc helicopter equipped with compact 90 degree swashhplate structure, the servo and other parts are easy to install. The circuitry is integrated with Receiver, ESC, Gyro and Mix with high sensitivity in receiving and strong interference immunity. The walkera mini rc helicopter offer some this great feature: One cell Lipo at 3.7V 400mAh offers 8- to 10-minute flight after fully charged and 4 channel transmitter with visible power indicator can avoid helicopter losing control due to the shortage of battery power, and support you to fly without any worry. Estimates price :$59.49


Labels: mini rc helicopter
Archive for the ‘RC Flight Simulator’ Category
Archive for the ‘RC Flight Simulator’ Category
RC Helicotpers – 1 Month Summary
Tuesday, August 3rd, 2010I’ve been flying a few days a week for just over a month now. I’ve been using E-Flite models starting with the Blade CX2 then moving to the Blade SR and the Blade mSR. I started practicing with training wheels and the phoenix flight simulator. I was quick to pick it up and I’m able to push the CX2 to its limits without problems. You can only go so fast with the coaxial models so I upgraded to the Blade SR and picked up an mSR on the side.
The E-Flite Blade CX2 got me started. I bought the RTF kit, extra battery and training gear. I was off the ground first go but only for a few seconds hover. I spent 1 week hovering and moving forward/backward left/right nose out. If you’re lucky to get a windless day take it outside and give yourself some playing room. The Blade CX2 is simple to correct if you lose control. Watch the wind. Even if the trees aren’t blowing there could be small small gusts that will affect the flight. Adding extra weight to the nose and moving the battery forward will help outdoor flights. I’ve crashed the CX2 a few times. I’ve replaced blades, skids, and one crash took out my canopy so I had an excuse to get another one. The main shaft is very slightly bent and noticeable at full throttle but it hasn’t affected the helicopter enough to need replacing. That will be the next repair.
The E-Flite Blade SR got me started on single rotor RC helicopters. I also got the training gear. The Phoenix RC Flight Simulator has the full line of E-Flite models so I flew the Blade SR for a few hours on the Sim before taking it out. My maiden flight was a success and I’ve been practicing basic forward/backward left/right movements nose out. I felt I was comfortable so I tried a simple circle. I ended up correcting a problem the wrong way and smashed it into the ground. I broke the blades, training gear, main gear, tail rod, and blew the tail motor. Fun, and I’ll have more fun undoing the solder to rewire the tail motor…
The E-Flite Blade mSR is the micro version of the Blade SR and my latest addition. It’s basically a very small single rotor helicopter and it’s fully loaded. I got the Bind and Fly kit meaning I can use my existing transmitter to control the Blade mSR. The maiden flight was the best one I’ve had yet. Out of the box, the Blade mSR was performing very well with my limited flying experience. I could fly it comfortably (nose out) in all directions. I brought the helicopter outside and played around with orientation. After just 2 days I’m very comfortable hovering and spot landing it. I own a handful of micro helicopters but the Blade mSR destroys them. If you like booting around every now and then indoors then this is the model for you. Spend the extra money and get into a real micro RC Helicopter.
Phoenix Flight Simulator – MAC/PC
Sunday, June 6th, 2010Back to the hobby store…
I talked to Don at Boys with Cool Toys. He was a technician working on a T REX 450 and explained what he was fixing. I walked in wanting velcro for my battery but eventually saw the RC flight simulators. Don knew everything about the variety of sims out there and got me on the Phoenix RC Flight Simulataion Horizon Hobby Exclusive Edition. Horizon makes the Blade’s so it includes my CX2. The simulator also comes with a transmitter to USB converter so your PC will recognize it. It plugs into the Trainer input on my Spektrum transmitter. The box says “PC/MAC” written on the top, and Don was surprised it worked on a Mac. I’ve got a macbook pro to try it on so I that would be a bonus. Not so easy…
The DVD wouldn’t install on the Mac, of course it won’t there were no compatabile installs on the disk. I went to the website support and it clearly says it will run on your mac, IF, you run a virtual or partitioned windows OS and that will cost you a windows license if you don’t have one. Sure, it’s not that hard with BootCamp on the Mac but not easy if you’ve never done it before. I found the fine print on the box later. Errrrrr. For the record, it runs like a dream on the macbook pro with windows besides the known heat-up issues when pushing graphics on windowfied macs.
I’ve had some fun with the flight sim. I’ve got it hooked up to the 50″! Having the transmitter connected to the computer for controlling flight. I’ve put about 6 hours into it and flying the CX2 is getting really easy. I’ve been flying the HoneyBee and Air Wolf for more of a challenge. I can’t talk technical about it because I’m really not sure what I’m talking about so that will wait for another post. The graphics were extremely realistic. Now, I play video games, a lot, and I’m packing a geforce 8800 GT, so there’s no problem testing its performance. There are 17 sceneries you can fly on. The water and close surroundings were as real as a photographic picture and movements couldn’t be any better unless I had a better transmitter. I’m really curious how a performance transmitter feels compared to my beginner spektrum.
HEAP GAS RC HELICOPTER
Saturday, October 16, 2010
Its interesting to talk about cheap gas rc helicopter. Is this is possible to get cheap gas rc helicopter? I think this is possible. You should read this article about gas rc helicopter to buy and Where you can get cheap gasoline rc helicopter too. I will give you the big idea to get this.
Labels: cheap gas rc helicopter
CHEAP GAS RC HELICOPTER... >>
by rc airplanes at 7:26 AM 0 comments links to this post
BEST GAS RC HELICOPTER
Do you want to buy gas rc helicopter? we will list some of best gas rc helicopter for you. Just make it as a review of the gas rc helicopter. The list come with product description and of course where you can buy it, so you can know a little deep about the rc helicopter. There are some of best gasoline rc helicopter we will list in this article and i hope you will like it.
Labels: best gas rc helicopter, best gasoline rc helicopter
BEST GAS RC HELICOPTER... >>
Saturday, October 16, 2010
Its interesting to talk about cheap gas rc helicopter. Is this is possible to get cheap gas rc helicopter? I think this is possible. You should read this article about gas rc helicopter to buy and Where you can get cheap gasoline rc helicopter too. I will give you the big idea to get this.
Labels: cheap gas rc helicopter
CHEAP GAS RC HELICOPTER... >>
by rc airplanes at 7:26 AM 0 comments links to this post
BEST GAS RC HELICOPTER
Do you want to buy gas rc helicopter? we will list some of best gas rc helicopter for you. Just make it as a review of the gas rc helicopter. The list come with product description and of course where you can buy it, so you can know a little deep about the rc helicopter. There are some of best gasoline rc helicopter we will list in this article and i hope you will like it.
Labels: best gas rc helicopter, best gasoline rc helicopter
BEST GAS RC HELICOPTER... >>
Cheap RC Helicopter
Cheap RC Helicopter
September 17th, 2010 by RC Geek
The Interceptor is not a micro or hobby grade RC Helicopter. I’ll categorize this model as a cheap RC helicopter. The price was right at $64.99 Canadian for the size. The LightHawk RC helicopter at $49.99 is comparable to the Interceptor but if you’re looking for something a little more powerful and very very easy to control the Interceptor RC will be a nice upgrade. If you’re used to flying with rudder control on the throttle stick you’ll need to make an adjustment because rudder is controlled on the right stick.
Features- BladeRunner serious Interceptor Outdoor Helicopter
- Includes gyroscope for stable controlled flights
- Includes replacement tail rotor and main rotor linkage
- USB charger
- Digital proportional flight control
- Internal 3.7 LiPo Battery included
Controls- Includes transmitter (9v battery for transmitter not included)
- Rudder trim control
- Normal and Advanced flying mode selection
- Left stick: throttle (up/down). Right stick: Forward/Backward, left/Right rudder.
Specifications
- Coaxial
- 21.6 x 3.7 x 8 inches
- 12 inch main rotor span
- 2 pounds
Charging is done by using the included USB charger. It requires to USB power sources and connects directly to the helicopter. USB charging is nice for electronic components but It’s not convenient for a 2 pound helicopter. Even with the few computers I have throughout my place I would still prefer a simpler power charger. You can buy car adapters that convert to USB. You can also buy USB converters that plug into the wall. They’re easy to find and are usually included with mobile phone packages and Apple products. If you’re geeky enough you can dig through your box of random tech junk and pull one out. That’s what I did!
Charging took 60 minutes (30-60 minutes from the manual) for first flight and I was in the air for 8 minutes stable throttle. Barely any trimming required and my first impression was smiles. It’s definitely got more punch compared to a typical toy RC helicopter. I haven’t crashed in the few flights I’ve had so I can’t tell you how durable it is. The main rotor blades are thick and heavy and will likely do more damage to whatever they hit. It doesn’t come with replacement main blades (only tail rotor) so be extra careful. The body is very durable, almost to durable. I think they could have saved a lot of weight if they cut back on the thick plastics but we’ll see how it tests to time.
You can select normal and pro flying mode from your transmitter. Pro mode will allow the helicopter to go slightly faster with more control, but it will be harder to fly. Overall, flying the helicopter is loads of fun and this model is a better representation of an advanced RC helicopter but of course lacks the components. A hobby grade RC helicopter model will have servos, control units, and a more advanced transmitter, but you will pay a lot more for those features.
cheap rc helicopter, interceptor rc, interceptor rc helicopter, micro rc helicopter, Reviews
Posted in Micro RC Helicopters, Reviews
RC Helicopter Cameras
September 11th, 2010 by RC Geek
Forget about spying on the neighbors. By attaching a wireless video camera to your RC helicopter you’ll have the ability to take incredible aerial photography.
A company specializing in radio controlled flying machines for over 10 years has come out with a model called the Draganflyer. The Draganflyer helicopter is a miniature aircraft for commercial/industrial aerial video and photography. The design utilizes eight main horizontal rotor blades and allows the rc helicopter to hover efficiently and maneuver rapidly using differential thrust. Eight efficient, electric motors allow the Draganflyer to carry heavier and more advanced payloads.
The cost isn’t mentioned on their website but you could be looking at the range of $10,000-$50,000. If you can’t find that many pennies under the couch you could always buy a mini video camera and hook it up to your existing RC helciopter.
This is the Etech Super Mini Fly Cam v3.0. For under $100 you can have a mini HD video camera. It weighs 14grams so you’ll need an RC helicopter powerful enough to support it. It will work on a modified Blade CX2 and up. A 400 size and up helicopter will work best. This camera works by recording video and saving it internally. You can then transfer the video via USB to your devices. It’s also charged by connecting the USB cable to a computer or USB charging device.
Check your local laws before flying an RC helicopter with a camera on it. In Ontario it’s strictly forbidden unless you have a permit. Taking aerial photography could also turn into a business. Taking pictures of real estate for advertising or snapping pictures of a golf course could be examples.
You can also connect wireless video cameras that let you control your RC helicopter from a remote monitor.
rc heli cameras, rc helicopter camera, video camera
Posted in RC Helicopter Cameras
Li’l Flyer Micro RC Helicopter Review
September 11th, 2010 by RC Geek
Micro RC helicopters can’t get much smaller than the Li’l Flyer. For a very good price you can own one and start flying RC helicopters. There’s been some negative feedback on this model but I’ve found it to be almost perfect.
I was first impressed with the repair kit it came with. A little box labeled “repair kit” full of many parts that will likely break. It comes with 8 replacement blades! It’s 2 sets of 4 but you usually just break a couple blades at a time, if any if you’re careful. It also comes with, flybar, screwdriver and hardware.
Charging took about 30 minutes with new batteries. Charging time will be longer as the batteries are used. There’s no forward movement. Some micro RC helicopters will have a tail rotor which can control forward and backwards flight. The Li’l flyer has no just the 2 coaxial blades and the design automatically moves the helicopter forward. If you’re just beginning to fly this is perfect because you’ll learn how to use the rudder. If you have experience flying I would suggest a piece of balled up tape on the front nose to make it faster. It works really well.
The rudder is very sensitive because of the size but the remote is fully capable of controlling fine movements. It also has left/right trim. Take-off is completely wacky but to me it’s a funny feature. The helicopter forces itself to spin when you take off. It’s possible to control but not worth the effort. Once you’re in the air the helicopter will start to move forward. The throttle control stick spring is a little strong but not something to worry about. Flying time is approximately 10 minutes.
Overall, the Li’l Flyer is FUN! I was surprised to see how stable it is in the air, no vibrations at all. Take-off is sketchy but always possible. Flying and landing is very controlled and the LED lights are great for the dark. When I added some weight to the nose it was like putting a new motor on. Definitely try that. I’ve crashed it lightly a few times but there’s not a single scratch! If you’re a beginner flyer, expect to brake some blades and if you’re a hobbyist this one’s fun to mess around with indoors and affordable to promptly add to the collection!
Out of the box:
- Li’l Flyer Ultra Compact RC Helicopter (with LED lights)
- Lipo Battery (charged by transmitter cable directly in helicopter)
- Infra-red Transmitter, single channel (sold A/B/C for up to 3 models in the air at the same time), 80 foot range.
- Repair Kit
No batteries included. Requires 6 AA’s.
lil flyer, micro rc helicopters, rc helicopter, Reviews
Posted in Micro RC Helicopters, Reviews
Micro RC Helicopters
September 10th, 2010 by RC Geek
Some call them micro, some call them miniature, and some just call them small RC helicopters. They all stand in at just under a few grams. The light weight design gives the model flying capabilities with minimum power.
There are several micro RC helicopter models available and I wouldn’t consider them toys. They’re all capable of flying and some have better technologies to improve stability.
There are several items that make up a micro RC helicopter. The picture above represents a cross-section of one. It’s a simple concept that works with a balanced aircraft.
Power
It’s powered by a dense lipo battery that moves the miniature dc-motor. Attached to the motor is the main gear that drives the main rotor. It also powers the Tail motor which moves the tail rotor.
Movement and Control
The infra-red sensor receives the movements from the transmitter which the controller board interprets to use variable power on the tail rotor. There are no servos on most micro RC helicopters. The fly-bar on top helps stabilize the helicopter and it’s all encased in a light Styrofoam body.
Most micro RC helicopters are made for the hobbyist. It’s a perfect introduction model if you’re interested in starting RC helicopter flying. These are also great for the experienced flyer because it’s safe to fly around indoors. The best part about micro RC helicopters is the price it costs to get the feeling of RC flying.
buy, micro rc helicopters
Posted in Micro RC Helicopters
When RC Helicopters Collide
September 10th, 2010 by RC Geek
I trained my friend with a buddy box (LP5DSM) and my DX7 on the E-Flite Blade mSR. Not a single crash and he was ready by himself. He took it by himself and flew it nose out, take off, and land, without crashing. Not bad from only flying coaxial micro RC helicopters. I had my Blade CX2 so I started flying at the same time. We were pretty good hovering them beside each other. Many flights later it happened, they collided. Surprisingly, the Blade mSR won the battle. The Blade CX2 top blade smashed, i think the canopy, of the Blade mSR causing the blade to snap at the end. The Blade mSR, not a scratch. Cool.
I’ve flown the Blade mSR everywhere for the past couple of months and I’ve yet to replace a part. It’s had several careful crashes and falls. The blades are scratched but not cut. I’ve had to clean the motors a few times but other than that it’s been perfect. I would still suggest the Blade CX2 if you want to start flying RC helicopters because it has more power for controlled flight and crashing once will most likely brake it so you’ll try harder to fly with control.
Blade CX2, blade msr, crash, rc helicopter
Posted in Blade CX2, Blade mSR, Crash Report
E-Flite Blade CX2 Outdoor Flying
September 1st, 2010 by RC Geek
Here’s another look at the E-Flite Blade CX2. I’ve been using the Blade mSR and Blade 120 SR and haven’t touched the CX2 in a while. I forgot how nice the extra power and size difference is. The Blade CX2 was the first model I bought and it’s perfect for getting into RC Helicopter flying. Mind the no so smooth landing…
Posted in Blade CX2
How to setup a Buddy Box
September 1st, 2010 by RC Geek
In this video I’ll show you how to connect a second transmitter to use as a “buddy box” when learning how to fly RC Helicopters or RC anything.
You will need a programmable transmitter and another one with a trainer input. The trainer cord can simply be a male to male stereo audio cable like one you would use with a computer. I found mine in a box of audio cables.
Bind your RC Helicopter to your master transmitter.
Depending on your transmitter you’ll need to set specific settings under the Trainer options. For the DX7 connecting to the LP5DSM (blade cx2 trasmitter) you’ll need to set P-Link mode. For connecting a DX7 to a DX6 you’ll need to select NORMAL mode. You also have an option to select which switch is used to give control to buddy box. With the DX7 you can select the left or right rocker switches.
You don’t need to turn on your slave controller. The feed from the cable doesn’t require power. You can also unplug the transmitter from your slave remote as it’s not required.
Plug in the cable to your master transmitter then plug it into the slave.
Test the controls and have fun. Now you can learn how to fly or let a friend try without the fear of
September 17th, 2010 by RC Geek
The Interceptor is not a micro or hobby grade RC Helicopter. I’ll categorize this model as a cheap RC helicopter. The price was right at $64.99 Canadian for the size. The LightHawk RC helicopter at $49.99 is comparable to the Interceptor but if you’re looking for something a little more powerful and very very easy to control the Interceptor RC will be a nice upgrade. If you’re used to flying with rudder control on the throttle stick you’ll need to make an adjustment because rudder is controlled on the right stick.
Features- BladeRunner serious Interceptor Outdoor Helicopter
- Includes gyroscope for stable controlled flights
- Includes replacement tail rotor and main rotor linkage
- USB charger
- Digital proportional flight control
- Internal 3.7 LiPo Battery included
Controls- Includes transmitter (9v battery for transmitter not included)
- Rudder trim control
- Normal and Advanced flying mode selection
- Left stick: throttle (up/down). Right stick: Forward/Backward, left/Right rudder.
Specifications
- Coaxial
- 21.6 x 3.7 x 8 inches
- 12 inch main rotor span
- 2 pounds
Charging is done by using the included USB charger. It requires to USB power sources and connects directly to the helicopter. USB charging is nice for electronic components but It’s not convenient for a 2 pound helicopter. Even with the few computers I have throughout my place I would still prefer a simpler power charger. You can buy car adapters that convert to USB. You can also buy USB converters that plug into the wall. They’re easy to find and are usually included with mobile phone packages and Apple products. If you’re geeky enough you can dig through your box of random tech junk and pull one out. That’s what I did!
Charging took 60 minutes (30-60 minutes from the manual) for first flight and I was in the air for 8 minutes stable throttle. Barely any trimming required and my first impression was smiles. It’s definitely got more punch compared to a typical toy RC helicopter. I haven’t crashed in the few flights I’ve had so I can’t tell you how durable it is. The main rotor blades are thick and heavy and will likely do more damage to whatever they hit. It doesn’t come with replacement main blades (only tail rotor) so be extra careful. The body is very durable, almost to durable. I think they could have saved a lot of weight if they cut back on the thick plastics but we’ll see how it tests to time.
You can select normal and pro flying mode from your transmitter. Pro mode will allow the helicopter to go slightly faster with more control, but it will be harder to fly. Overall, flying the helicopter is loads of fun and this model is a better representation of an advanced RC helicopter but of course lacks the components. A hobby grade RC helicopter model will have servos, control units, and a more advanced transmitter, but you will pay a lot more for those features.
cheap rc helicopter, interceptor rc, interceptor rc helicopter, micro rc helicopter, Reviews
Posted in Micro RC Helicopters, Reviews
RC Helicopter Cameras
September 11th, 2010 by RC Geek
Forget about spying on the neighbors. By attaching a wireless video camera to your RC helicopter you’ll have the ability to take incredible aerial photography.
A company specializing in radio controlled flying machines for over 10 years has come out with a model called the Draganflyer. The Draganflyer helicopter is a miniature aircraft for commercial/industrial aerial video and photography. The design utilizes eight main horizontal rotor blades and allows the rc helicopter to hover efficiently and maneuver rapidly using differential thrust. Eight efficient, electric motors allow the Draganflyer to carry heavier and more advanced payloads.
The cost isn’t mentioned on their website but you could be looking at the range of $10,000-$50,000. If you can’t find that many pennies under the couch you could always buy a mini video camera and hook it up to your existing RC helciopter.
This is the Etech Super Mini Fly Cam v3.0. For under $100 you can have a mini HD video camera. It weighs 14grams so you’ll need an RC helicopter powerful enough to support it. It will work on a modified Blade CX2 and up. A 400 size and up helicopter will work best. This camera works by recording video and saving it internally. You can then transfer the video via USB to your devices. It’s also charged by connecting the USB cable to a computer or USB charging device.
Check your local laws before flying an RC helicopter with a camera on it. In Ontario it’s strictly forbidden unless you have a permit. Taking aerial photography could also turn into a business. Taking pictures of real estate for advertising or snapping pictures of a golf course could be examples.
You can also connect wireless video cameras that let you control your RC helicopter from a remote monitor.
rc heli cameras, rc helicopter camera, video camera
Posted in RC Helicopter Cameras
Li’l Flyer Micro RC Helicopter Review
September 11th, 2010 by RC Geek
Micro RC helicopters can’t get much smaller than the Li’l Flyer. For a very good price you can own one and start flying RC helicopters. There’s been some negative feedback on this model but I’ve found it to be almost perfect.
I was first impressed with the repair kit it came with. A little box labeled “repair kit” full of many parts that will likely break. It comes with 8 replacement blades! It’s 2 sets of 4 but you usually just break a couple blades at a time, if any if you’re careful. It also comes with, flybar, screwdriver and hardware.
Charging took about 30 minutes with new batteries. Charging time will be longer as the batteries are used. There’s no forward movement. Some micro RC helicopters will have a tail rotor which can control forward and backwards flight. The Li’l flyer has no just the 2 coaxial blades and the design automatically moves the helicopter forward. If you’re just beginning to fly this is perfect because you’ll learn how to use the rudder. If you have experience flying I would suggest a piece of balled up tape on the front nose to make it faster. It works really well.
The rudder is very sensitive because of the size but the remote is fully capable of controlling fine movements. It also has left/right trim. Take-off is completely wacky but to me it’s a funny feature. The helicopter forces itself to spin when you take off. It’s possible to control but not worth the effort. Once you’re in the air the helicopter will start to move forward. The throttle control stick spring is a little strong but not something to worry about. Flying time is approximately 10 minutes.
Overall, the Li’l Flyer is FUN! I was surprised to see how stable it is in the air, no vibrations at all. Take-off is sketchy but always possible. Flying and landing is very controlled and the LED lights are great for the dark. When I added some weight to the nose it was like putting a new motor on. Definitely try that. I’ve crashed it lightly a few times but there’s not a single scratch! If you’re a beginner flyer, expect to brake some blades and if you’re a hobbyist this one’s fun to mess around with indoors and affordable to promptly add to the collection!
Out of the box:
- Li’l Flyer Ultra Compact RC Helicopter (with LED lights)
- Lipo Battery (charged by transmitter cable directly in helicopter)
- Infra-red Transmitter, single channel (sold A/B/C for up to 3 models in the air at the same time), 80 foot range.
- Repair Kit
No batteries included. Requires 6 AA’s.
lil flyer, micro rc helicopters, rc helicopter, Reviews
Posted in Micro RC Helicopters, Reviews
Micro RC Helicopters
September 10th, 2010 by RC Geek
Some call them micro, some call them miniature, and some just call them small RC helicopters. They all stand in at just under a few grams. The light weight design gives the model flying capabilities with minimum power.
There are several micro RC helicopter models available and I wouldn’t consider them toys. They’re all capable of flying and some have better technologies to improve stability.
There are several items that make up a micro RC helicopter. The picture above represents a cross-section of one. It’s a simple concept that works with a balanced aircraft.
Power
It’s powered by a dense lipo battery that moves the miniature dc-motor. Attached to the motor is the main gear that drives the main rotor. It also powers the Tail motor which moves the tail rotor.
Movement and Control
The infra-red sensor receives the movements from the transmitter which the controller board interprets to use variable power on the tail rotor. There are no servos on most micro RC helicopters. The fly-bar on top helps stabilize the helicopter and it’s all encased in a light Styrofoam body.
Most micro RC helicopters are made for the hobbyist. It’s a perfect introduction model if you’re interested in starting RC helicopter flying. These are also great for the experienced flyer because it’s safe to fly around indoors. The best part about micro RC helicopters is the price it costs to get the feeling of RC flying.
buy, micro rc helicopters
Posted in Micro RC Helicopters
When RC Helicopters Collide
September 10th, 2010 by RC Geek
I trained my friend with a buddy box (LP5DSM) and my DX7 on the E-Flite Blade mSR. Not a single crash and he was ready by himself. He took it by himself and flew it nose out, take off, and land, without crashing. Not bad from only flying coaxial micro RC helicopters. I had my Blade CX2 so I started flying at the same time. We were pretty good hovering them beside each other. Many flights later it happened, they collided. Surprisingly, the Blade mSR won the battle. The Blade CX2 top blade smashed, i think the canopy, of the Blade mSR causing the blade to snap at the end. The Blade mSR, not a scratch. Cool.
I’ve flown the Blade mSR everywhere for the past couple of months and I’ve yet to replace a part. It’s had several careful crashes and falls. The blades are scratched but not cut. I’ve had to clean the motors a few times but other than that it’s been perfect. I would still suggest the Blade CX2 if you want to start flying RC helicopters because it has more power for controlled flight and crashing once will most likely brake it so you’ll try harder to fly with control.
Blade CX2, blade msr, crash, rc helicopter
Posted in Blade CX2, Blade mSR, Crash Report
E-Flite Blade CX2 Outdoor Flying
September 1st, 2010 by RC Geek
Here’s another look at the E-Flite Blade CX2. I’ve been using the Blade mSR and Blade 120 SR and haven’t touched the CX2 in a while. I forgot how nice the extra power and size difference is. The Blade CX2 was the first model I bought and it’s perfect for getting into RC Helicopter flying. Mind the no so smooth landing…
Posted in Blade CX2
How to setup a Buddy Box
September 1st, 2010 by RC Geek
In this video I’ll show you how to connect a second transmitter to use as a “buddy box” when learning how to fly RC Helicopters or RC anything.
You will need a programmable transmitter and another one with a trainer input. The trainer cord can simply be a male to male stereo audio cable like one you would use with a computer. I found mine in a box of audio cables.
Bind your RC Helicopter to your master transmitter.
Depending on your transmitter you’ll need to set specific settings under the Trainer options. For the DX7 connecting to the LP5DSM (blade cx2 trasmitter) you’ll need to set P-Link mode. For connecting a DX7 to a DX6 you’ll need to select NORMAL mode. You also have an option to select which switch is used to give control to buddy box. With the DX7 you can select the left or right rocker switches.
You don’t need to turn on your slave controller. The feed from the cable doesn’t require power. You can also unplug the transmitter from your slave remote as it’s not required.
Plug in the cable to your master transmitter then plug it into the slave.
Test the controls and have fun. Now you can learn how to fly or let a friend try without the fear of
Subscribe to:
Posts (Atom)